How to Key Out White in After Effects
As one of the top-editing programs, After Effects will achieve good keying. Several plugins will help you do a good green screen removal or chroma key inside AE. From my experience, if you want to know how to remove a green screen in Adobe After Effects, the most efficient way is to use a combination of three plugins: Keylight, Advanced Spill Suppressor, and Key Cleaner.
Keylight
Keylight is a chroma keyer that will remove the selected color of your background screen and make it transparent.
Advanced Spill Suppressor
Advanced Spill Suppressor will remove or clean the color spills that are left on the subject's margins.
Key Cleaner
Key Cleaner will clean the edges of your subject and make them sharp or smooth.
Tip: You can have softboxes or lights in the frame — there is no problem. Take the pen tool and make a rough mask around the subject. This method will get you rid of unwanted objects.
What is a Chroma Key?
Chroma Key is also known as a blue or green screen. It is not just the screen; it involves filming objects or subjects (actors) in front of the single-color screen. After the filming is done, video editing software is used to key out or remove the color from behind the actor, making it see-through or transparent. Therefore, you are free to add any background footage you want and place the subject in any type of set. You can make it look like you are driving a car without a license, or even import any 2D or 3D animation and make it look like it plays with the actor.
When filming the actor on chroma, the lightning of the background screen plays a big role in getting a good chroma key. If it is not done properly, the keying process becomes hard to impossible to realize.
If you are new to this industry and you plan to film your chroma, I recommend that you first watch a guide on how to adjust the lights. The long story short, you must avoid darker greens, the screen hast to be bright and uniform.
1. Remove Green Screen in After Effects With Keylight
Import the footage and add the plugins
Import your footage inside the After Effects project and create a new composition with it. For the next step, you can either add each plugin one by one, or all at the same time. Under the "Image Utilities" in the Animation Presets window, you will find them grouped as Keylight+Key Cleaner+Advanced Spill Suppressor.
Remove the color
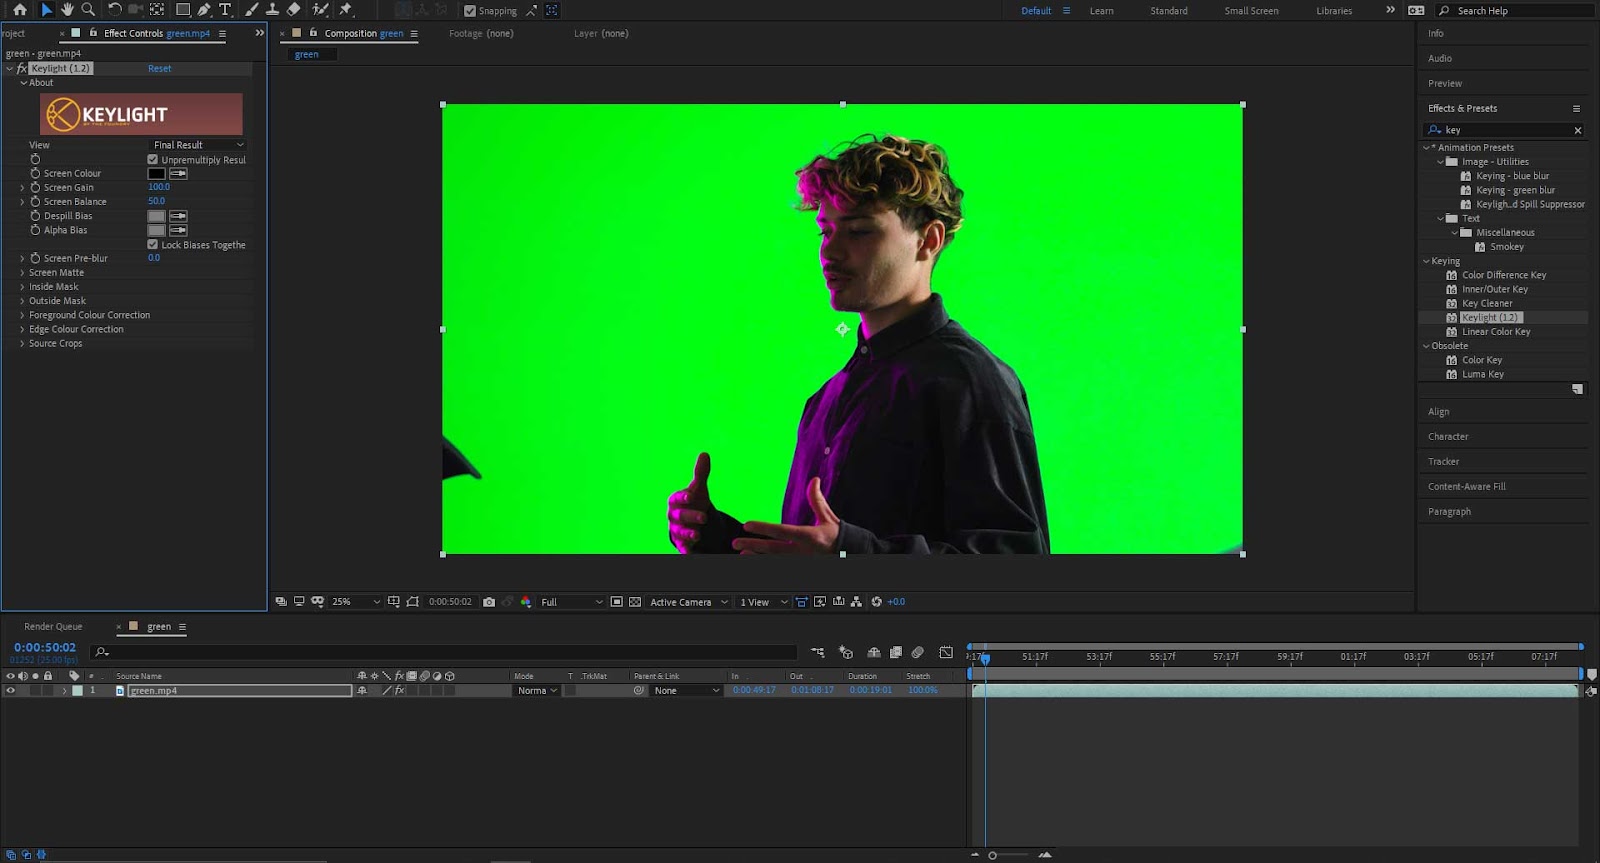
To remove a green screen in After Effects, go to "Animation Presets" and search for Keylight, drag and drop it over the footage, and move your attention to the "Effects Controls" window.
With the color selector, set the Screen Colour to your background's screen color (in this example, it's green).
Clean the key
You surely notice that there are still some pieces left that are not keyed properly. To eliminate them, simply set the view in Combined Matte mode and crank up the Screen Gain a notch.
Combined Matte will turn everything that is not transparent to white; this way you can easily see the remaining debris.
After cleaning the frame, set the view back to Intermediate Result. If the Final Result view is accidentally set, artifacts will occur on your footage.
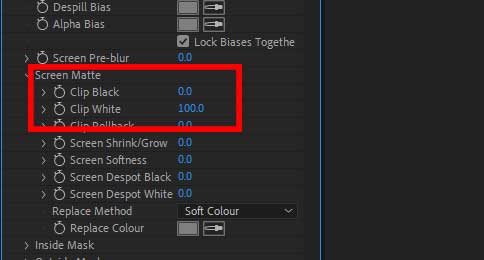
If you still need more adjustments to completely clean the frame, you can access the "Screen Matte" section. Clip Black and Clip White will help you do it. Go ahead and crank up the Clip Black and lower the Clip White. If needed, you can also adjust the other settings, but everything should be fine by now from my experience.
2. Advanced Spill Suppressor in After Effects
The Intermediate Result view mode will leave the margins with a green color spill — you do not want that! To remove it, you must add the Advanced Spill Suppressor plugin.
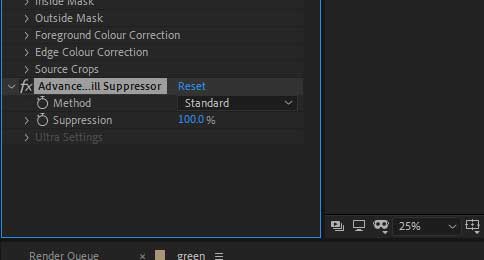
Out of the box, it will automatically detect the color it needs to remove and will have great results. However, if something unexpected happens, set the Method to Ultra and manually select the color.
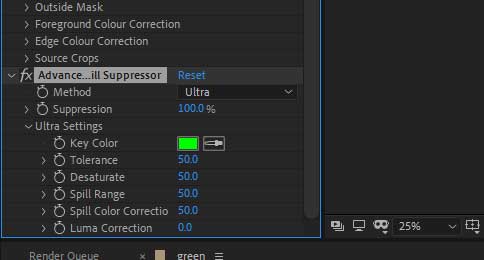
Besides changing the key color, you can also further fine-tune the settings and get everything as smooth as you want it to be.
3. Key Cleaner in After Effects
Depending on how the keyed footage looks at this point, you might want to modify some settings. My advice is to check the Reduce Chater box — by doing so, it will eliminate visible noise around the edges of the subject.
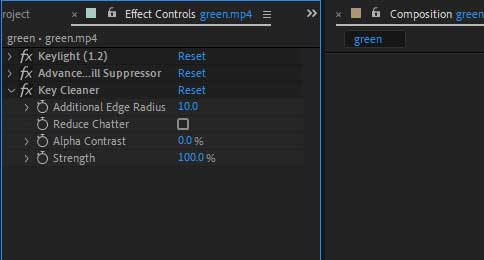
In case the edges are too soft, you can always crank up the Alpha Contrast. Although, avoid increasing too much. If increased too much, it will make the margins look pixelated and extremely sharp.
I recommend using a lower value for Additional Edge Radius — it all depends on the footage. Most of the time I got away with a lower value.
If you want, you can check the video below and see how I go through all these steps. It takes me only two minutes to complete the keying settings. It should not take you much longer than that but do not worry if it does, you will get better at it!
Finish!
Now you have learned what a chroma key is, how to remove a green screen in After Effects and how to adjust some settings if things go wrong. Remember, if the footage is not correctly captured, you will not be able to correctly key out the green screen. Pay extra attention to the lights and avoid spill!
Feel free to go check out my other After Effects tutorials to learn more tips & tricks.
Big thanks for the footage by Stunt Camera Crew. See how they accepted the #ShootLikeAPro challenge to "break the boundary of time". Completing 3 amazing videos in just 3 days was never a problem!

How to Key Out White in After Effects
Source: https://teckers.com/remove-green-screen-after-effects/